Toilet installation guide
Whether you're installing a better-flushing toilet or resetting the old one after remodeling, these tips will help you do it faster and with fewer problems.
There are a few “tricks” that are important to the success of the job. If you are looking to purchase a new toilet, you'll need to know the "rough-in" measurement (the distance between the center of the flange around the drain opening and the wall behind it). Different styles of toilet vary in how far they sit away from the wall. You can select a toilet designed for a shorter rough-in measurement (you'll just have to add some supportive blocking between the back of the tank and the wall), but you can't install a fixture designed for a longer rough-in measurement without some complicated alterations to the drain line.
To remove an existing toilet, first shut off the water supply. If you’re lucky, you can simply close the “shut-off valve” located in the narrow water supply line (usually found at the lower left rear of the toilet bowl.) If you don't have a shut-off valve for the toilet, look for a valve on the supply line to the entire bathroom, or turn off the water at the meter. Flush the toilet to drain the tank, disconnect the water supply line, and use a sponge to remove any remaining water. Loosen and remove the two bolts that hold the tank to the bowl and carefully lift the tank free. (If the bolts won't turn, try lubricating them with WD-40™; if that doesn't work, you'll probably need to cut through them with a hacksaw blade.) Flush the water from the bowl by pouring into a bucket quickly, or mop out the water with rags.
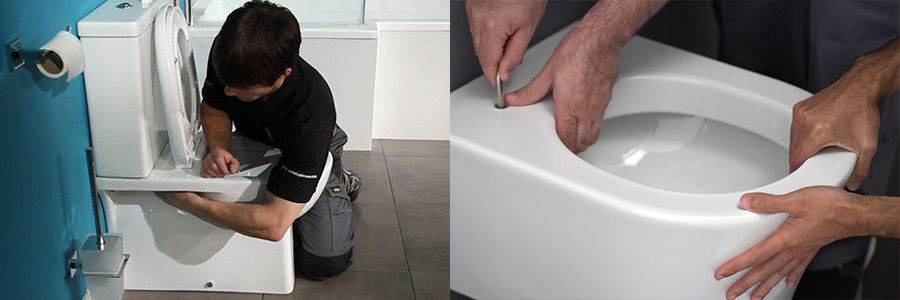
Next, loosen and remove the nuts and washers on the bolts holding the toilet stool to the floor. These bolts are located on either side of the base (some are hidden under decorative caps). Loosen the gasket that seals the toilet to the drain line with a slight twisting motion, and then carefully lift the stool straight up, approximately 8 inches. (Hint: If you'll be removing the toilet from the house, slip a large garbage bag up and around the stool from underneath, to prevent slopping water on the floor as you carry it out.) Stuff a rag into the drain opening to prevent sewer gas from entering the house. Before installing a new toilet (or re-installing the old one), check the condition of the floor around the flange (the metal “collar” that inserts into the sewer drain).
Repair any areas that have been damaged by water leaks. The flange must be secured tightly to the floor to keep the toilet from moving. If you are replacing your toilet after putting in new bathroom flooring, check whether the new floor is thicker than before. If so, you may need a flange extension. The toilet is sealed to the floor by a wax ring that circles the horn (the area on the bottom of the toilet that protrudes into the drain opening.) This wax ring should be replaced with a new one whenever a toilet is taken up from the floor. Scrape all the old wax off the horn and the flange, and then take a new wax gasket, at room temperature, and press it in place around the horn. Remove the rag blocking the drain, and set the bowl in place (making sure the bolts are inserted into the mounting holes.) Gently push down with a twisting motion, until the outer edge of the toilet base is evenly in contact with the surrounding floor. Replace the washers and nuts on the bolts that extend through the flange and toilet mounting holes, and tighten them gradually, alternating from side to side. When they begin to feel snug, place your weight on the stool and tighten them again. (Don't overtighten, as the porcelain bowl may crack.)
If the bolts are new, cut off the excess with a hacksaw blade, and then replace the bolt caps. Replace the washers and bolts between the tank and bowl, and set the tank in place. (Use only brass tank bolts, as brass-plated steel bolts will eventually rust and crumble.) Tighten the nuts on the tank bolts carefully, just until they feel snug and the tank is level. Then, reconnect the water supply lines, open the valves, and check for any leaks at the base of the tank as it fills. Flush the toilet several times and check for leaks around the base of the stool.


